
티스토리 뷰
과정
1. css폴더 안에 style.css 파일 생성하고 코드 작성하기
.index {
  color: red;
}
2. index.js 수정하기
- 3번째 줄의 import css를 추가했다.
- 일반적으로는 html파일에서 <script>태그로 css파일을 불러오는 식으로 사용하지만, 웹팩의 경우 import,export를 사용하여 모듈로써 css를 사용한다.
import { Example } from "./example.js";
import { App } from "./App.js";
import "./css/style.css";

const Index = () => {
  const element = document.createElement("div");
  element.innerHTML = "<h2>Index 컴포넌트</h2>";
  element.className = "index";

  return element;
};

document.body.appendChild(Index());
document.body.appendChild(App());
document.body.appendChild(Example());
3. css로더, style로더 설치하기
- npm i css-loader -D
- npm i style-loader -D
4. webpack.config.js의 module: { } 부분에 코드 추가하기
- test: css확장자를 가진 것들에게 아래의 로더들을 적용한다는 것
- use: style로더와 css로더 둘 다 있어야 함 // 순서가 바뀌면 안됨 // 로더 오른쪽부터 적용됨
- style로더는 <head>안에 인라인 스타일로 코드 넣어주는 역할을 함
var path = require("path");

module.exports = {
  mode: "none",
  entry: "./src/index.js",
  output: {
    filename: "main.js",
    path: path.resolve(__dirname, "build"),
  },
  module: {
    rules: [
      {
        test: /\.css$/,
        use: ["style-loader", "css-loader"],
      },
    ],
  },
};
5. index.html
<html>
  <head>
    <title>Webpack</title>
  </head>
  <body>
    <script src="build/main.js"></script>
  </body>
</html>
6. npm run build 입력 후 index.html에서 live server로 확인
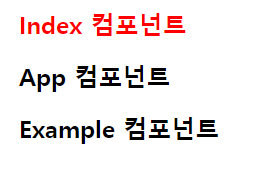
결론
생각보다 간단하게 설정을 완료했다.
이어서 바벨 로더도 설정해봐야겠다!.!
'프론트엔드' 카테고리의 다른 글
| 웹팩 데브 서버 설정하기 (0) | 2022.08.12 |
|---|---|
| 바벨 로더 설정하기 (0) | 2022.08.11 |
| 웹팩의 빠른 로딩 속도 비교하기 (0) | 2022.08.11 |
| useRef와 useState의 변화에 따른 렌더링 차이 (0) | 2022.08.07 |
| PR에서 테스팅 후 성공시에만 자동 Merge하기 (0) | 2022.08.03 |
댓글
- Total
- Today
- Yesterday